Video SEO can be an incredibly powerful tool for business owners. I’ve mentioned video SEO a few times in blog posts and in my courses, but I want to go deeper. In this article I’m going to explain how to easily succeed with it and what you need to know.
Why You Should Care About Video SEO
I get a lot of pushback when I try to talk to business owners and marketers about using videos. Here’s the deal. For starters, 99% of your competition isn’t doing anything with video.
This means you have an unfair advantage and can reap some serious rewards by using this media format. If you’re in the SEO space, you’re most likely already putting effort into creating text-based content. Video is essentially the same thing, but with…well…video.
When you leverage YouTube you are now showing up in two search engines as opposed to one. Yes, YouTube is a search engine. This means two times the traffic, visibility, leads, calls, sales…you name it, you can get it from YouTube as well. Plus it’s my experience that it’s actually easier to generate clicks with video opposed to traditional SEO.
Okay, with that being said let’s now dive into the how of video SEO.
Creating A YouTube Channel
To start off we will need a YouTube channel. This is free and easy to create. Simply hop on over to YouTube’s website and click on the video camera icon with the plus. This should prompt you to get some parts of your channel set up. Alternatively, you can click this link to go directly to the channel creation page.
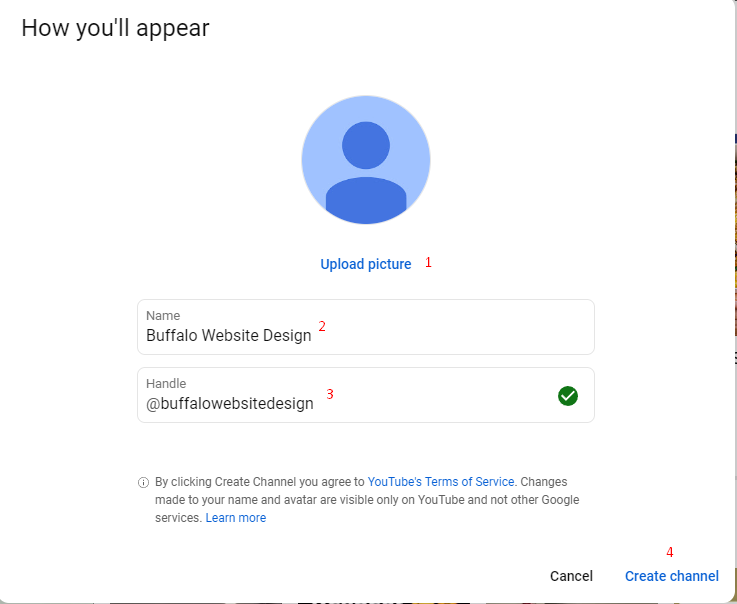
First, upload your business logo by clicking on the blue “Upload picture” text under the blue icon of a person. Then enter your business name under Name, and put in a handle (or username) in the box. Once finished, click on the blue “Create channel” button in the bottom right.
Once complete, it will take you to your new YouTube channel.
Initial Channel Optimization
While your channel is now technically created on paper, we’ll want to fully optimize it to show up in search. There’s a few important steps we still need to complete. First, we need to customize our channel. Click on the blue “Customize channel” button in the upper right.
We’re going to work our way left to right under Channel customization.
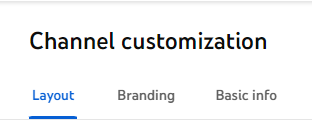
Branding
Let’s start with branding. There are two images I recommend setting up here. The first one being your banner image.
When it comes to channel images and branding, these can be easily created for free using Canva. Canva is a free image editor you can use in your browser without having to download anything. It’s what I personally use to design all the images you see at the top of each blog post.
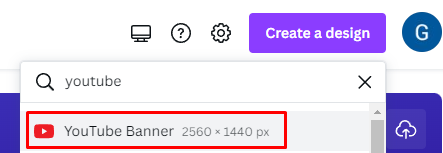
Canva actually has a template for YouTube banners. Inside Canva click on the purple “Create Design” button, and then type in YouTube. It will automatically pop up with the banner as an option. Go ahead and click on that.
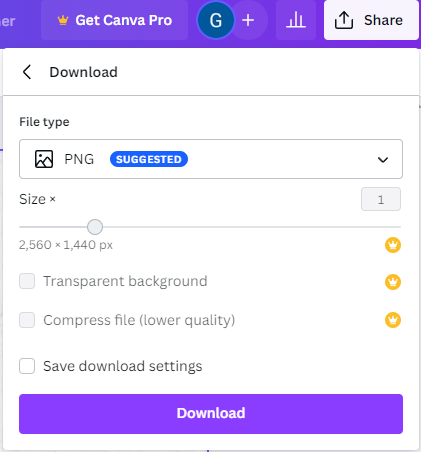
It will have several templates on the left you can choose from. Canva is super easy to use and it’s all click and drag. Within 15 minutes you should have a decent banner. Once you are done customizing your design click on the white “Share” button in the upper right, then select Download and choose .PNG for the file type.
Boom! Just like that, we have a banner. For a watermark I recommend using your logo. You can create a design in Canva that is 150 x 150 pixels (the size you’ll need.) Then just upload your logo and resize it to fit.
Once both your banner and watermarks are uploaded, it’s time to move on to the next step of getting your channel set up.
Basic Info
It’s time to write a channel description. This is super important for video SEO, and will help improve your channel reach on the platform. You want to mention relevant keywords and related synonyms to your business in the description box.
NOTE: I have to preface here that you do NOT want to keyword stuff. Keep the description real and easy to read. Your description should be an actual description, not just a bunch of mashed and jumbled words.
A good length for a channel description is between 500 and 800 words. The first 150 words are the most important, and should contain the following:
- Your business name
- What it is you do
- Service/product keywords (preferably around 3)
Again, I can’t stress the importance of keeping this natural. Take your time with the description as once it’s done it’s a “set and forget” thing.
Now that we’ve written up a decent channel description, it’s time to specify keywords (or tags) that are relevant to our channel.
Channel Keywords
Click on the “Settings” Icon with the gear in the bottom right of your YouTube Studio dashboard.

Then select Channel on the left, and you’ll notice there’s a new tab that also says Basic info. This is where we are going to enter our keywords. It’s also worth quickly selecting your country of residence in the dropdown box above the keywords one.
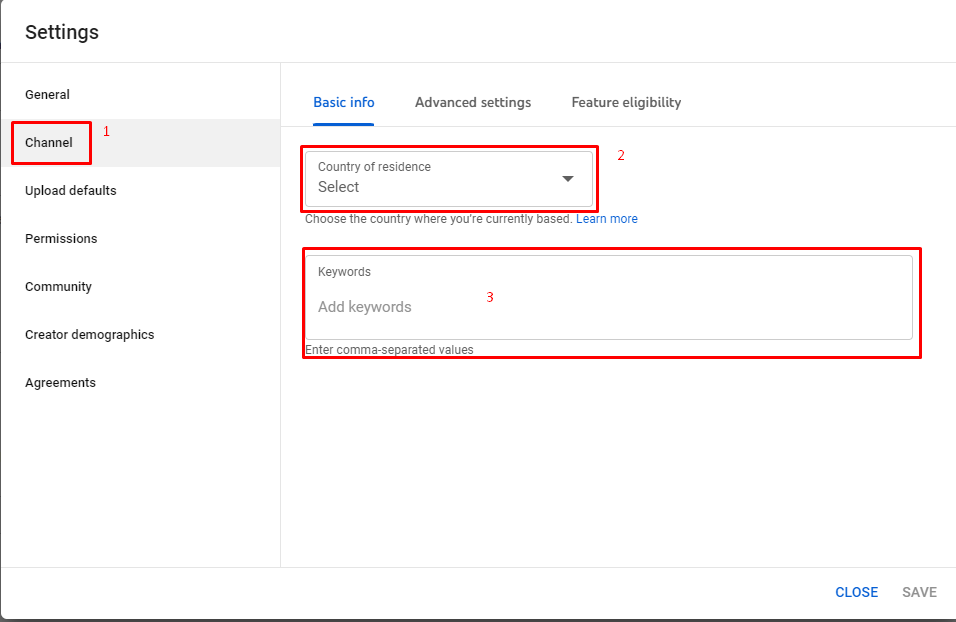
As you type phrases in, you can hit enter or comma to separate them. You have a character limit here of 500. I recommend doing your research to see what terms should go here. I have an excellent guide on how to find proven keywords that I recommend checking out for this.
It’s also important to include your business name as the first keyword in this list. That way, your YouTube channel will also show up for brand related searches. Once you’ve entered the keywords in, you’re done with the initial channel set up and optimization!
Bonus: Setting Up An IFTTT Network
Before we move on to uploading videos and how to optimize them, I wanted to include a powerful bonus strategy. Videos by themselves can only get pushed so far by the YouTube algorithm…especially when you have a new channel.
However, what if there was a way to automatically share your videos to over 20 social media networks and websites every time you upload a video? Not only would that boost the algorithm’s reach of your video, but it would potentially generate some decent traffic as well. That’s where an IFTTT network comes into play.
What IFTTT Is
IFTTT stands for “If That, Then That”. It’s automation technology that triggers events when conditions are met. Now I know this sounds extremely technical, but it doesn’t have to be. In fact, you can pay someone to set one up for you.
Outsourcing IFTTT
You can hire someone on Fiverr to build an IFTTT network with profiles and accounts for you as well. If you’ve read my blog posts or been through my courses, you’ll know I usually say to avoid Fiverr. However, this is an exception to that rule.

You can find sellers on Fiverr to set up a complete IFTTT network for as low as $50. If you want to invest in this (which I do recommend) make sure to take the time to do your due diligence. Look at reviews and make sure to buy from sellers who have completed IFTTT orders before.
The sellers will automatically create the accounts that will share your content for you. Typically, how this works is when you place an order they will send you a spreadsheet. Inside the spreadsheet you can specify the links to your blog and YouTube channel.
From there, the seller will do the rest and set up the linking and more complex, technical aspects of the IFTTT network.
Creating Your First Video
Alright, now that we have a fully optimized channel and some next level automation for our SEO, it’s time to begin getting videos out there. Each video has to be cleverly crafted and optimized to achieve your business goals and rank in the YouTube algorithm as well.
In Local SEO Shuriken I cover how to easily create service videos that automatically achieve your business goals. Essentially, you want to film answers to commonly asked questions in your niche or industry. Alternatively, you can make a video talking about the services that you offer.
Obviously you want people to reach out to your business or complete an action as a result of these videos. If you have video editing software, you’ll want to include a caption that has your website URL and phone number in the video itself.
An Important Note On Creating Videos
I often get a lot of pushback from both business owners and marketers when it comes to video marketing. It seems like people have a million excuses and refuse to be creative. One of the biggest common objections I hear is “But Gabriel, I don’t have professional camera equipment.”
Look, I’m going to be real with you. We live in a time where the smartphone in your pocket has as good a camera quality as you need for YouTube. Stop worrying and get creating. That’s what you need to do to achieve your business goals. You’re never going to have everything figured out.
In terms of video format, you can just talk to the camera as if you were talking to another person. Believe it or not, that’s actually good enough for your video content. It comes across as personable and people will feel like there’s a more genuine connection if you do this.,
Optimizing The Video File
Once you have a recorded video, it’s time to optimize it. As a side note if you plan on doing video editing you will want to do your edits and render your video file before moving on to this step. You should be working with a final video file at this point in the process.
There are two major optimizations we can do with a video file.
Optimizing The File Name
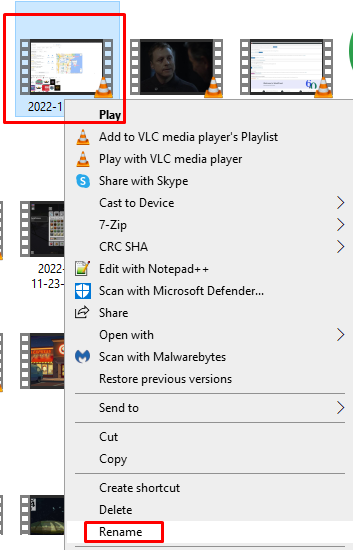
Just like with image SEO, video files should have the keywords in the file name itself. On Windows you can simply right click your video file and select the “Rename” option. Try to keep your video between 3 – 5 words for the filename, and specify your primary keyword you want to rank for.
Once done, simply hit the enter key on your keyboard to submit the change to the file. There’s one final optimization we have to do to the file itself before uploading it to YouTube.
Optimizing The Metadata
Metadata is information included in a file on your computer. This data is sent with the file if it is uploaded or moved to another computer or service. There’s a few elements we want to optimize inside our video file’s metadata.
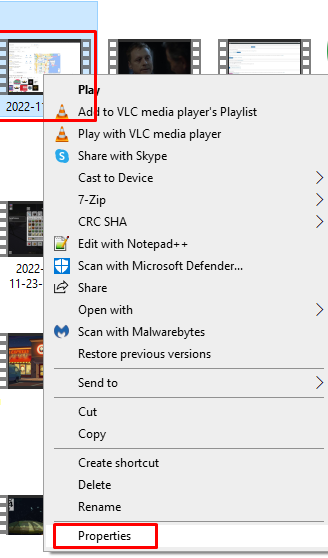
To access your video’s metadata, right click on the file and select the “Properties” option at the bottom.
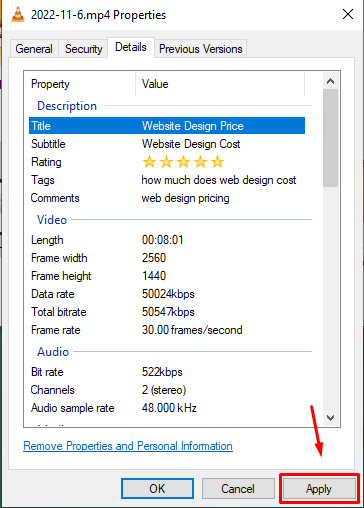
Then click on the “Details” tab at the top. This will bring you to the metadata information.

These are the boxes you’ll want to fill out:
- Title
- Subtitle
- Tags
- Comments
- Genre
- Directors
- Producers
- Publisher
- Author URL
In the title, subtitle, tags, and comments boxes you will want to put related keywords or synonyms for the phrase you are trying to rank for. Make sure each box has something different in it. We don’t just want to spam the same keyword here.
For genre, put how you would describe the video. Is it an informational one…? Or a review? Be specific.
For director, producer, and publisher, put your business name. This is important to build some brand relevancy and give YouTube a good understanding of what property this content belongs to.
Finally, for the author URL specify the link to your YouTube channel or business website here. (I recommend putting your YouTube channel URL.) This will build relevance and allow your channel to get more outreach with the YouTube algorithm.
Once you are done entering your metadata, hit the “Apply” button in the bottom right to write your changes to the video file.
Uploading Your First Video
Okay, you did it! You now have an awesome video that is optimized for SEO. Now it’s time to get the thing on YouTube and do some final optimizations on their platform. To do this, head over to the YouTube website.
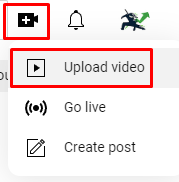
Then, simply click on the video camera icon with the plus in the upper right, and then choose “Upload video”.
Browse to your newly optimized video file and select it. YouTube will automatically begin uploading and processing it, and you will be presented with boxes to enter some information. These are very important to complete for your video’s SEO and ranking, so make sure to take your time with this step.
Video Title
Make sure to include your primary keyword in the video title box. Don’t just have this be your keyword alone, however. You want this to read naturally and be a normal looking video title.
For example, if I ran a website design business and my business was called “Buffalo Website Design”, then I would name my video something along the lines of “Affordable Website Design In Buffalo, NY” if it was an advert or informational video. Combine your keyword with some enticing words to get people to click.
Description
There’s a lot we want to do with the description. First, you want to include your business name, website address, and phone number. But just like with the video title, we want this to read naturally. Start the description off with 2-3 sentences about what the video is about. Then put your contact/call to information at the bottom. Make sure your website address is formatted as a link with the https:// in front.
Thumbnail
Believe it or not, a thumbnail is everything when it comes to video SEO. After all, if your video doesn’t get clicked on there’s no point to any of this. CTR (or Click-Thru Rate) is a very important metric you need to focus on with your videos.
Earlier in this blog post we covered Canva, and how you can easily design channel branding using their free website. Canva also has proven YouTube thumbnail templates you can use, along with the ideal image size as a template.
I’m not going to dive super deep into thumbnails, as that could be its own article. But I’ll give you the basics quickly here. You want a thumbnail that:
- Stops people from scrolling
- Captures their attention
- Showcases what the video is about at a glance
- Looks clean
- Simple, not too much going on
- Is personable (has a picture of you or a team member)
Statistically, the color red and having arrows in YouTube thumbnails works well to get people’s attention.
Just like with your video file, you’ll want to put the primary keyword or search phrase you are trying to rank for in the file name of the thumbnail. When you do an export from Canva, choose .PNG as the file format and save it as this. Don’t skip this step! It takes less than a minute to do and really does help overall with your video’s SEO.
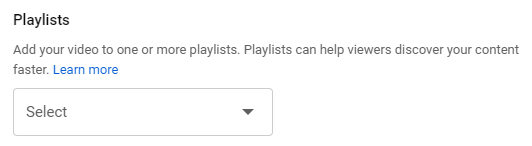
Playlist
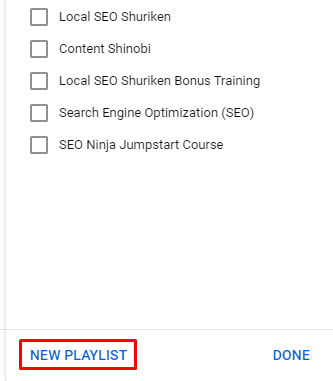
Playlists are a really important element of video SEO. Essentially the more videos there are in a playlist, the higher that playlist’s ranking power is. You can go into your channel settings and optimize playlists themselves with tags (or keywords) and complete descriptions.
We’re not going to go that deep for now, but you’ll want to create a playlist and name it a service or product that you offer. You can do this by clicking on the dropdown under “Playlists” and then clicking on “New Playlist” in the bottom left.
Tags
Finally, video tags. These are like keywords, but for your video. You’ll notice YouTube gives you 500 characters to work with for this one. Specify your primary keyword first, and then enter related synonyms or searches. Try to get as close to the 500 character limit as you can. The more tags you specify, the more relevance you build.
Miscellaneous Details
Make sure to take a second to select the video language and date it was recorded. Always opt to give YouTube as much information as possible, it can only help your SEO. Once done, it’s time to publish your video. Click on the blue “Next” buttons in the bottom right. When you get to the final screen, select the “Public” option.
Boom! Your video is live.
Sharing Your Video
We put a lot of work into both creating and optimizing that video. You want to make sure you get as much as possible out of it. When you share your video on social media, this sends positive signals to YouTube’s algorithm that people are engaging with your content.
I recommend sharing it on all your major business profiles. You can use a tool like HootSuite to easily share your content to up to 2 profiles at once for free via one dashboard.
What To Do Next
Congratulations on making it this far! Give yourself a big pat on the back. You’ve done what the 99% won’t do, and that’s how you get the results 1% get. The next steps you should focus on are creating more videos and boosting your channel’s SEO juice even further.
If you run a small business, I recommend implementing video as a regular marketing tool in your business. You can hold monthly Q&A’s with your team, or answer questions about your industry or niche. Just like with traditional SEO, content consistency is incredibly important here. So keep publishing, and you’ll generate tons of clicks, calls, leads, and sales.
Want To Be A SEO Ninja…?
Want to learn proven, powerful, and effective strategies for SEO? Check out my awesome course Local SEO Shuriken. It contains the keys to the kingdom for SEO and teaches you how to easily rank any business #1 in search.